Here is the beaded hairstick tutorial that was requested. Sorry it took so long to get this together! Have fun!!!
Supplies:Old news papers
2 Wooden hairstick
2 20 gauge head pins or 18 gauge stick pins
2 Focal beads
Smaller accent beads and findings
Marker
small ruler
Pliers (1 for cutting wire, 1 for bending wire)
2 Part Epoxy Glue - fast drying
Paper plate (something to put glue on for mixing)
Toothpicks
Damp rag or towel
Cup
uncooked rice or small beans
~~~~~~~~~
A good online source for wooden hairsticks and jewelry supplies is www.firemountaingems.com
~~~~~~~~~
BEFORE YOU BEGIN ~ it is a good idea to lay some old newspapers on your work surface to protect it. I used white craft paper to help with getting clearer pics.
STEP 1
Assemble beads on head pins ~ Take your time and play with this a little. Rearrange your beads and set them on top of your wooden sticks to see how it will look all together. ~~Once you find a design in which your are happy, set aside your beads.
STEP 2There are a few different ways to go about the next step. Please read through the options to determine which would work best for you.

 Version 1
 ~
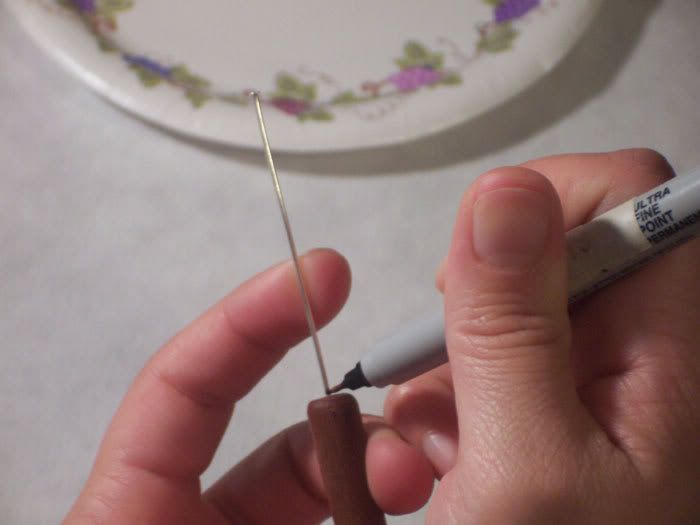
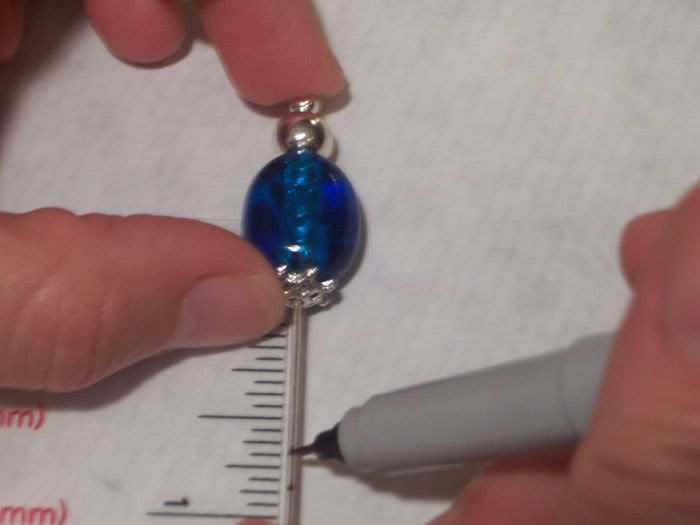
this is for a headpin that fits into the hairstick hole well, in other words, a pretty perfect fit: Take your head pins and place them into the top of the hairsticks to measure the depth of the hole in the sticks. Mark the head pin with a marker, then measure the length of the head pin with a ruler. Slide beads back onto the head pin. Using that measurement, measure from the bottom of the beaded topper down and cut (it will be the mark closest to the beads).
Version 2 ~
this is for a headpin that is too thin for the hairstick hole: (Make your measurement(s) the same as Version 1) To make a thicker head pin, you don't have to cut the headpin at all. You can simply bend the headpin at the bottom of your measurement. Clip off any extra after you have bent the head pin.
Version 3 ~
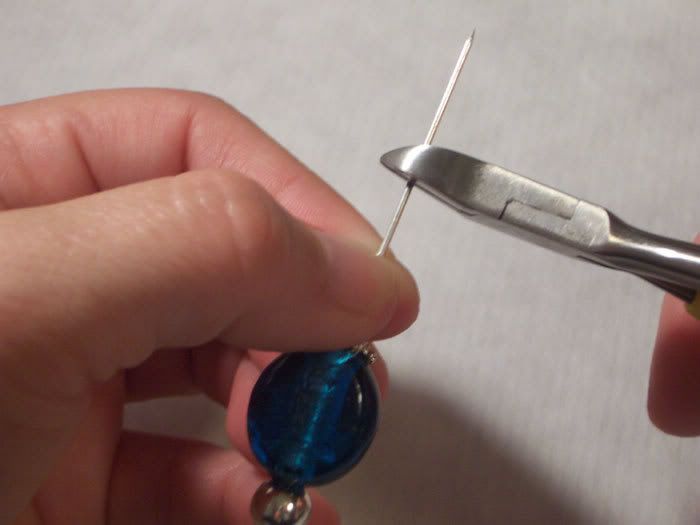
this is if headpins are still too thin after bending them in version 2: Make slight zigzag bends on the head pins using your pliers.
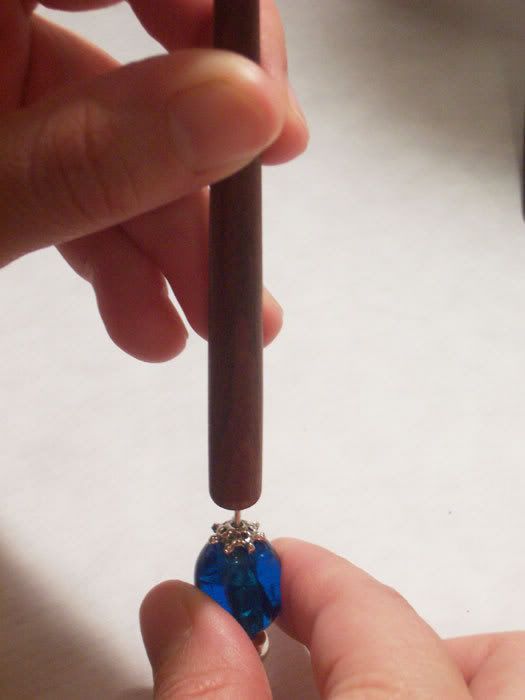
 Version 4
 ~
this is if your headpins/wire/stickpins are difficult to bend: In the pic, I used the zigzag method without bending my headpin to make it thicker.
**note - Make sure to measure the depth of the hole in each hairstick as some holes may vary
STEP 3Lay sticks and toppers together, set aside, so they are ready to be put together. Fill cup with uncooked rice. Put enough rice to hold the hairstick upright. Make sure the stick can stand still, you do not want it to move at all.
 STEP 4
Push a small amount of 2 part epoxy onto the paper plate. Mix glue thoroughly with a toothpick until you see the whitish coloring become uniform. The coloring is very subtle, but you should be able to see the difference when you are mixing it. At this point you have 5 minutes until the glue hardens. (you're not feeling any pressure, are you? lol)
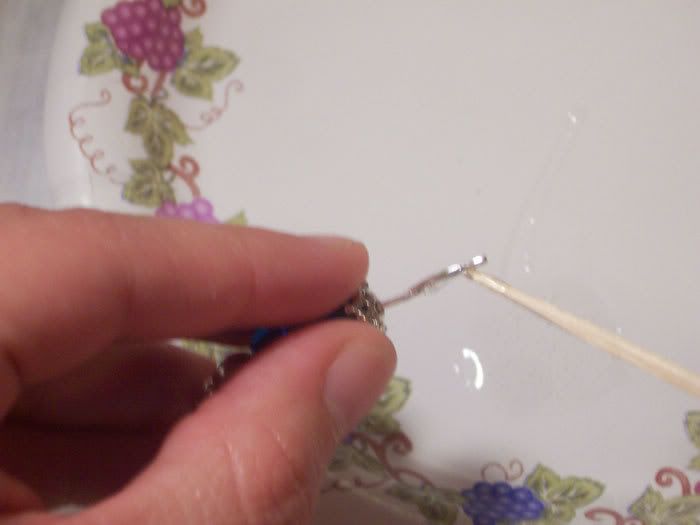
 STEP 5
Using a clean toothpick, place a small amount of glue onto the top of a wooden stick and a good amount onto the head pin. Carefully push the topper into the stick. Make sure the head pin is pushed all the way into the hole. Turn everything upside-down and push the stick downward, onto the topper if needed. It shouldn't go in easily, you want some friction/resistance. This way you know that your zigzag headpin is scraping against the edges of the hole.
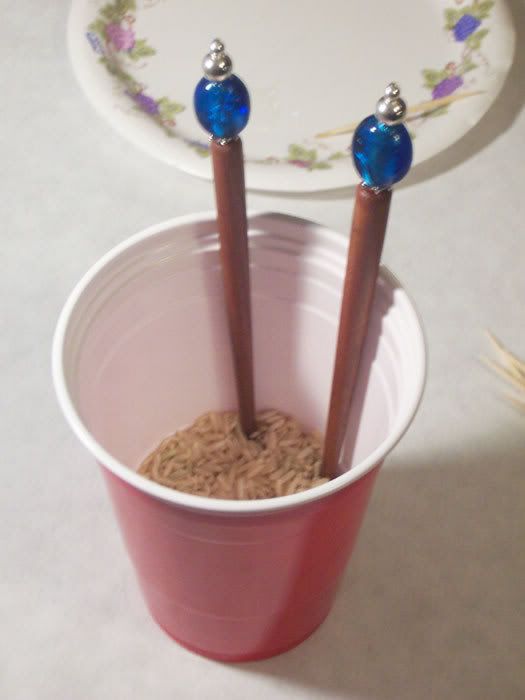
If your topper is slanted, you can bend the head pin and rearrange the beads at this point if needed. Wipe away any excess glue with dampened towel. Place assembled hairstick into the rice filled cup.
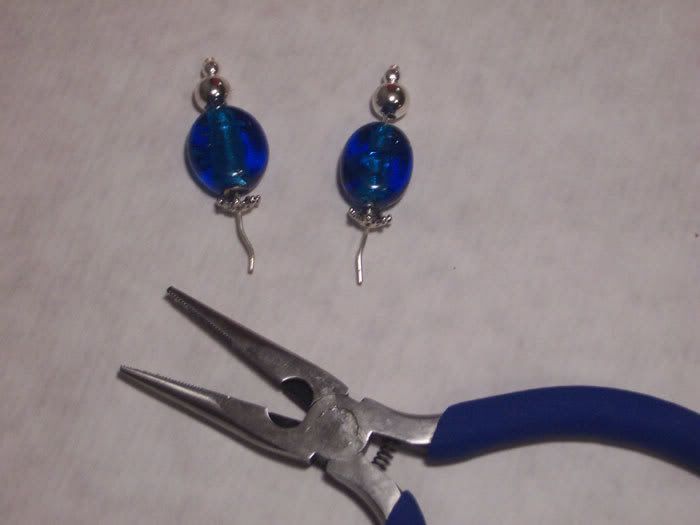
STEP 6Assemble the other stick and place in cup.
STEP 7Go back and check the first stick you put together. Sometimes the beads slide, so again, rearrange the beads as necessary before your five minutes are up. Once the glue sets, you cannot fix any mistakes. You are done.
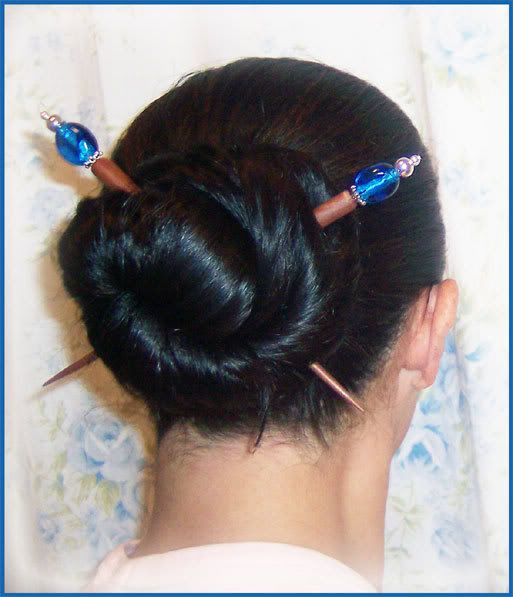
After the glue has cured for 24 hours, your new hairsticks are ready to be worn! Taa Daa!
Now that wasn't so hard, was it? :0D
If you have any questions or any tips to add, please leave a comment here. Otherwise, enjoy your new beautiful set of beaded hairsticks, made by you!
Here is the beaded hairstick tutorial that was requested. Sorry it took so long to get this together! Have fun!!!
Supplies:Old news papers
2 Wooden hairstick
2 20 gauge head pins or 18 gauge stick pins
2 Focal beads
Smaller accent beads and findings
Marker
small ruler
Pliers (1 for cutting wire, 1 for bending wire)
2 Part Epoxy Glue - fast drying
Paper plate (something to put glue on for mixing)
Toothpicks
Damp rag or towel
Cup
uncooked rice or small beans
~~~~~~~~~
A good online source for wooden hairsticks and jewelry supplies is www.firemountaingems.com
~~~~~~~~~
BEFORE YOU BEGIN ~ it is a good idea to lay some old newspapers on your work surface to protect it. I used white craft paper to help with getting clearer pics.
STEP 1Assemble beads on head pins ~ Take your time and play with this a little. Rearrange your beads and set them on top of your wooden sticks to see how it will look all together. ~~Once you find a design in which your are happy, set aside your beads.
STEP 2There are a few different ways to go about the next step. Please read through the options to determine which would work best for you.
Version 1 ~
this is for a headpin that fits into the hairstick hole well, in other words, a pretty perfect fit: Take your head pins and place them into the top of the hairsticks to measure the depth of the hole in the sticks. Mark the head pin with a marker, then measure the length of the head pin with a ruler. Slide beads back onto the head pin. Using that measurement, measure from the bottom of the beaded topper down and cut (it will be the mark closest to the beads).
Version 2 ~
this is for a headpin that is too thin for the hairstick hole: (Make your measurement(s) the same as Version 1) To make a thicker head pin, you don't have to cut the headpin at all. You can simply bend the headpin at the bottom of your measurement. Clip off any extra after you have bent the head pin.
Version 3 ~
this is if headpins are still too thin after bending them in version 2: Make slight zigzag bends on the head pins using your pliers.
Version 4 ~
this is if your headpins/wire/stickpins are difficult to bend: In the pic, I used the zigzag method without bending my headpin to make it thicker.
**note - Make sure to measure the depth of the hole in each hairstick as some holes may vary
STEP 3Lay sticks and toppers together, set aside, so they are ready to be put together. Fill cup with uncooked rice. Put enough rice to hold the hairstick upright. Make sure the stick can stand still, you do not want it to move at all.
STEP 4Push a small amount of 2 part epoxy onto the paper plate. Mix glue thoroughly with a toothpick until you see the whitish coloring become uniform. The coloring is very subtle, but you should be able to see the difference when you are mixing it. At this point you have 5 minutes until the glue hardens. (you're not feeling any pressure, are you? lol)
STEP 5Using a clean toothpick, place a small amount of glue onto the top of a wooden stick and a good amount onto the head pin. Carefully push the topper into the stick. Make sure the head pin is pushed all the way into the hole. Turn everything upside-down and push the stick downward, onto the topper if needed. It shouldn't go in easily, you want some friction/resistance. This way you know that your zigzag headpin is scraping against the edges of the hole.
If your topper is slanted, you can bend the head pin and rearrange the beads at this point if needed. Wipe away any excess glue with dampened towel. Place assembled hairstick into the rice filled cup.
STEP 6Assemble the other stick and place in cup.
STEP 7Go back and check the first stick you put together. Sometimes the beads slide, so again, rearrange the beads as necessary before your five minutes are up. Once the glue sets, you cannot fix any mistakes. You are done.
After the glue has cured for 24 hours, your new hairsticks are ready to be worn! Taa Daa!
Now that wasn't so hard, was it? :0D
If you have any questions or any tips to add, please leave a comment here. Otherwise, enjoy your new beautiful set of beaded hairsticks, made by you!

3 comments:
This is a godsend. I can not afford the custom sticks I've been finding a la Foxy. Thanks.
Oh this is very nice! Do you think you could do one on dangles too? :D
Hi Ashley! I'll see what I can put together for you. I appreciate the request! Let me know if you have a specific dangle style you are looking to create. :-)
Post a Comment